Folders and Filelist
Folder Tree
Every folder in EverDesk email software can contain various file types – emails, documents, web links, applications, photos, music, videos and even contacts. Therefore every activity folder can contain all the relevant information for a particular activity, project or task.
The folder tree area contains several sections for different types of folders: You can select which section to show and which to hide by clicking the respective button in the Folders bar, above folder tree area.
![]()
Mail Folders section
This section contains mail folders for all your mail accounts.
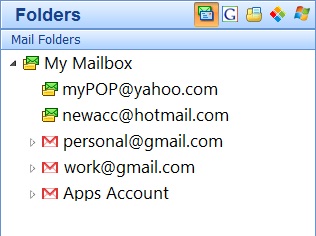
The top level folder is My Mailbox folder – your global mailbox which shows messages from all your accounts in one place. You can select which accounts to show in My Mailbox by right-clicking on My Mailbox and selecting Configure My Mailbox. Besides email messages and attachments you can also store your regular files and documents here, by copying or moving them from other folders.
All spam and unwanted emails get sorted to the Junk Mail folder.
To enable the Junk Mail folder you need to activate Junk Mail Filtering in Settings > Mail > Junk Mail Filtering. EverDesk will then automatically detect unwanted emails and send them to the Junk Mail folder which will now become visible in the folder tree.
You can mark mail as “junk” by right-clicking it in the file list and selecting Junk Mail, or by selecting the email and clicking the Junk button in the main toolbar. This will move the email to the Junk Mail folder and remove it from your main folders.
Google Docs section
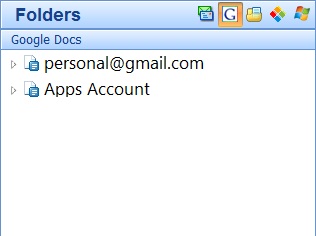
This section contains Google Docs from Google accounts – one folder per account. See <Google Docs> for more details.
My Folders section
This section contains your activity (or subject) folders.
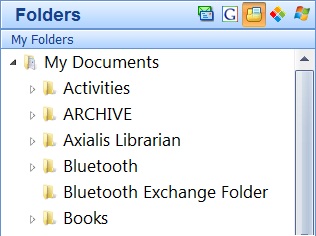
The top-level folder here is the EverDesk Root Folder - by default, this is set to your My Documents. However, you can specify a different root folder in Settings > General.
Other activity folders are subfolders within your Root Folder – this is where you can organise and keep all of your information, emails, documents and files together for a particular activity, subject or project.
Please see the Getting Started Guide for more information on how to make the best use of activity folders, including how to send and receive emails from activity folders.
You can create a new folder in My Folders and in Windows Folders sections:
• By clicking the “New” button in the Main Toolbar, or;
• By right-clicking a folder in the Folder Tree and selecting Create New Folder from the menu. This will create a new folder within the selected folder.
You can choose to hide or unhide specific folders in the folder tree. This is handy as it allows you to switch on only those folders on your computer that you regularly use, and hide unnecessary folders or archives.
In order to set a folder to be hidden, right-click on it in the folder tree and select Properties. There you can tick the Hidden checkbox and click OK. Changes will take effect the next time you restart EverDesk.
EverDesk Data
This is a hidden folder containing all the application data and parameters, including your default settings, encryption keys, quickboard layout etc. We recommend that you do not modify any of its contents.
EverDesk Mail
This is another hidden application data folder which contains all of your email data. All of your emails can be accessed in EverDesk by selecting My Mailbox or the respective account folder.
Neither the EverDesk Data nor EverDesk Mail folder is shown in the file tree, but you may come across them when navigating in Windows Explorer if you have selected the option to show hidden files and folders.
It is recommended that you leave these folders alone and do not modify their contents. For backing up your email data and EverDesk settings, please see Flash Drive and backup.
Categories section
This section contains all of your Categories – virtual folders which let you see your files, emails and documents by category. Categories are a useful feature in EverDesk which allows you to group together relevant files, documents and emails, even if they are physically in different folders. This means you do not have to duplicate content in order for it to be stored with more than one project (category).
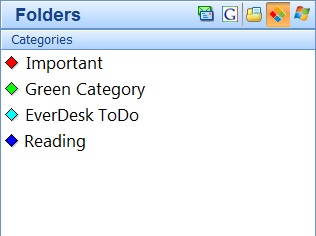
To assign a category to a file or email, simply right-click on its name, select the option Assign Category from the menu and select the category you want.
To create a new category, manage existing categories or change the colour assigned to a category, simply right-click on any document’s name, select Assign Category from the menu and then select Customize Categories.
Alternatively, you can right-click in the Categories section of the folder tree area and select the option Customize Categories. You will see the following window:
You can create as many categories as you wish, and you can assign more than one category to a file or document.
In order to see all the files within a category simply select the respective category in the Categories section.
You can set up a sorting rule to automatically assign a category to incoming mail based on certain criteria (coming soon).
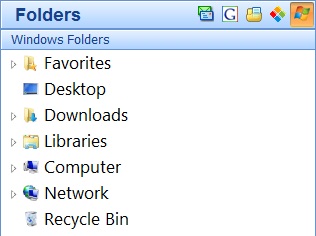
Windows Folders
This section shows standard Windows folders that you would normally be able to see in Windows Explorer.
File List
This is where all the contents of a folder are displayed, including emails, files and documents.
Files – Any type of file, including text documents, spreadsheets, images, videos, music etc.
To open a file or email, simply click the icon, or if you prefer, you can double-click on the file name.
INSERT PICTURE
Open Bundles (show attachments)
In EverDesk you can choose to show all attachments as normal files in the file list view. To enable this, click the <icon> next to the email name in the file list.
The attachments will then be displayed as files in a group under the email message, as shown below. Clicking the icon again will close the bundle and hide the attachments.
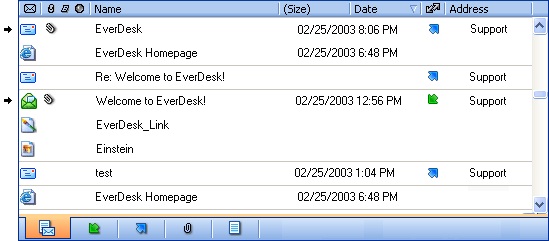
(The two arrows point to emails with “open bundles”. Notice how the attachment files are displayed below the email and they are grouped together without the horizontal lines that separate them from other files in the file list)
File List Filters
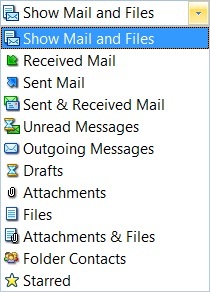
These filters allow you to restrict which files you wish to view in the file list. There are two ways to access the main file list filters.
- In the drop-down menu above the file list view, or;
- Using the tabs located under the file list.
![]()
The two are synchronised and offer the same functionality.
You can hide and unhide individual filters in Settings>General. You can also get more information on how to improve searching for files and emails in Finding Stuff Easily.
Extension Filter
This filter allows you to display only a certain file type within the file list view.
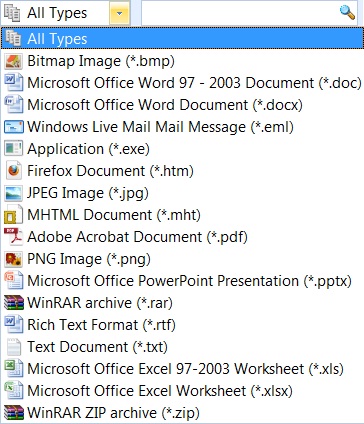
To filter by file type, simply select the required type of file you wish to restrict the file list view to in the drop down menu above the file list.
Sorting Bar
The bar at the top of the file list view allows you to quickly sort your files by either Name, Size / Date, Incoming/Outgoing and Address.
![]()
Simply click the required sorting field in the bar, to sort by that specific field. Clicking the same field again will change from ascending to descending order.
- Name
Sorts files by the file name
- Size / Date
Sorts files by size, or by Date Modified (including when the file was sent/received if emailed)
In order to maximise the amount of space available on the screen, the date and size fields are not shown simultaneously.
When sorting by date, the date is displayed – to see the size of a file simply hover over the date with your mouse and it will be displayed.
Clicking the Size column header once will show the size of all the files in the list view, without sorting by Size. Clicking the Size column header a second time will sort the files by size.
The same is true when the files are sorted by size and you wish to view their date modified.
- Incoming / Outgoing
By clicking the arrows field, you can sort your file list by incoming and outgoing mail (e.g. incoming first or outgoing first)
- Address
Sorts by the recipient for outgoing mail and sender for incoming mail. By hovering over the address field with the mouse cursor, you will be able to see the full address information for that file, including all recipients and CC details – particularly useful when emails are sent to groups of people.
You can always add a contact directly from the file list view by right clicking the contact in the address field and selecting Manage Contacts.
Sticker note
Sticker notes are handy text comments which you can add to any file.
By placing your mouse over the space to the left of the file name or simply by hovering over the file name itself, you will see a note icon ![]() appear – simply click it to add a note.
appear – simply click it to add a note.
You can quickly view existing notes simply by hovering over the file name.
To edit a note, click the note icon ![]() next to the file name.
next to the file name.
You may also add / edit notes by right-clicking on the file name and selecting Add / Edit Note.
To delete a note, edit it to clear the contents. You can click the Clear button in the note window and click Save to delete the note.
Category marker
When you assign a category to a file, the coloured category marker will appear to the left of the file name.
Please see Categories on more details on how to create, assign, edit and delete categories.
Important (Google Edition only)
If you receive an email marked as Important, this icon ![]() will be displayed to the left of the file name.
will be displayed to the left of the file name.
You can mark files and emails as important by right-clicking the file name and selecting Mark as Important. To unmark the file, right-click it and select Mark as Unimportant or click the ![]() icon to the left of the file name.
icon to the left of the file name.
You can quickly view all files marked as important using the Important File List Filter.
Star (Google Edition only)
You can mark files and emails by “starring” them. This reduces the need to mark read emails as “unread” in order to identify the need to come back to them in the future.
By placing your mouse over the space to the left of the file name or simply by hovering over the file name itself, you will see a star icon ![]() appear – simply click it to add or remove a star.
appear – simply click it to add or remove a star.
Clicking on the icon repeatedly will cycle through several colours of stars to allow you more choice in marking a file. You can also select the star style by right-clicking the icon. The number of available star styles can be selected in your Google mail settings through your web browser.
To remove a star marker, simply click on the icon or select no star after right-clicking it or click repeatedly until no star is visible.
As with Important messages, you can quickly view all starred emails using the Starred File List Filter.
